Pages

Showing posts with label wall decor. Show all posts

May 16, 2011

the not-so-dainty jewelry holder

If you are anything like me, you like your jewelry over-sized. I have quite the jewelry collection these days, and sadly, no where to hang them up where they are free from tangles and easily displayed for my perusal. What I needed was a jewelry holder as big and as bold as my favorite Anthro necklaces. Voila!
 After dreaming up a number of different ideas for a jewelry holder that would be both stylish and capable of holding at least 10 lbs, I went to the thrift store for a scouting trip.
 At the store, I found this used picture. The frame measures just under 3'x3', so I thought it could be big enough to handle my project. I bought the picture for $5 and brought it to the hardware store. The frame was a little dinged up, and I would have considered refinishing, but once I discovered it was actually particle board, painting became the necessary step.

At the hardware store, I found these molding strips. You could just use a thin plywood, but the molding had a nice beveled edge. I measured the inside of the frame, and cut the strips accordingly. (Did you know they have stations with saws where you can cut the wood yourself in the store! Awesome!)

I picked my color scheme to match my room. Since the piece is so big, I figured it could double as wall art (which my bedroom desperately needs... more on that later. I found a patterned wrapping paper I really enjoyed at a local shop called the Paper Merchant that sells specialty papers, then took the paper to Joanns for a perfect color match in an acrylic paint. I went with a matte finish, but you could go for gloss if you wanted to!

Once the frame and molding strips were painted blue, I measured and cut my wrapping paper to fit inside the frame. I also decided what heights to put the molding strips at and marked the spots on the picture with a pencil. I decided (after some epic failing) to cut the paper into 3 pieces and put each in separately. There was some slight gaping between the existing picture and the frame under which I was able to slide the wrapping paper for a more secure fit and total coverage.

 I decided to use an acid-free double stick tape (after staring at the adhesive aisle for about 20 minutes). Because wrapping paper is so thin, I knew that any sort of glue would result in wrinkles in the paper. Placing some tape on the picture, I put the wrapping on in strips, tucking the edges under the frame. I used the pencil markers to make sure the seams in the paper were hidden under the molding. 

After deciding how far apart to space the hooks for the jewelry, I marked every 3" on the strips, staggering the middle strip by 1.5". I made holes over the marks with a nail. If you try to screw the hooks straight in, you risk splitting the wood *no good. 

 
The hooks I found at the hardware store were simple 5/8" hooks, which was appropriate for the width of the wood. I screwed each one into the holes in the wood. (Please note: this is much easier to do with pliers, which we did not have and ended up with red, aching fingers.)
Once all of the hooks were good to go, I glued the strips to the edges of the frame with liquid nails. You'll definitely want to use a similar product for this step to avoid the strips crashing down and breaking your project. Let the project sit and dry for at least an hour, and definitely over night before hanging anything from it. Once everything has set, mount it on your wall and fill it with your loveliest jewelry!

To make this project at home, you'll need:
Old picture frame
Strips of plywood/molding cut to fit just inside the frame
Hooks
Paper for the background
Acrylic paint
Double stick tape
Liquid nails
Nail/Hammer
Pliers

You could try making this with a different frame shapes and color schemes. You could also opt to paint the background, rather than use patterned paper. Make sure to send a picture my way if you make your own!

 Happy Crafting!

May 9, 2011

a bit obsessed with bunting...

I'm not sure what it is about bunting these days... but I just can't get enough of those darling little flags!

 Since Kev and I aren't exactly in the market for high-end art at this point in our lives, (let's be real... even the sale section of HomeGoods can be a bit over-priced) I decided that it was going to be my undertaking to create/find fabulous decor for our little home.

My sister-in-law Emily gifted me this fabulous little book for Christmas this year. Her taste in decorating is amazing and she has created quite a few splendid things herself (guest blogging potential? I hope!). This is my first project from the book, but I'm sure I'll be attempting others in the future.

Step one is finding some fabulous patterned papers from your local craft store, scrapbook store or specialty paper store. You'll notice that I did not end up using all of these, but I'm sure they'll find a crafty home somewhere.

Step two is collecting some thin card board; cereal boxes are a good source. Using a straight edge and ruler, cut a triangle out of the cardboard. Mine is as wide as it is tall, but yours doesn't have to be as long as the angles are the same and the edges are straight! Using your pattern, create as many cardboard flags and you'll want to use. I did eight flags, which made a decent-sized strand. When you have the cardboard ready, trace the shapes on to your paper, cut it out and paste it to the cardboard using modpodge. Use a hole punch to create holes about a half-inch in from the side in the top corners. This is the point at which I strayed from the book a little. Instead of using individual 5" pieces of ribbon to connect the flags, I decided to string them on some jute so the flags would be spread out a little more.

I used leftover 3M hooks to put them up (I used the super cheap kind that come in a large pack for hanging Christmas lights). I put three on an angle to give the look a little dimension and break up the cornery-ness of that area of the room. You could easily just tack loops at the end of the string with nails if you wanted to hang them straight!
If you want to try this at home, you'll need:
Thin cardboard
Ruler/straight edge
Patterned/colored paper
Hole punch
ModPodge
Ribbon/twine/jute
3M mini hooks/nails

First of all, yes, that is obviously Nick Stokes from CSI and I obviously did not want to turn it off to improve the picture because this part was clearly riveting. :)
Second of all, I was happy the result of the flags. I noticed a few flags that were on a sharper angle slid a little, but that is an easy fix with a little glue on the back of the flags.

I am using this a more of a permanent decorative item, but you could easily make these for a party because they are pretty quick and easy to make. They are also inexpensive because most crafters probably have most/all of the supplies at home anyway. Try making them for a party! You could also use contrasting patterned paper/solid paper to make letters and spell something out on your flags.

Let me know how your version turns out!

February 17, 2011

sprucing up the walls!

The problem:
My apartment walls were plain and boring and they needed a little excitement! I thought about a photo collage but was having difficulty figuring out how to make it happen. Then my thought process moved on towards wall decals. There are so many cute options out there for wall decals, but finding them on a large scale can be quite pricey. The ones I was interested in, mostly floor to ceiling trees, were running about $90 for a set, and none of the sets had the height of my peaked ceilings for enough trees to stretch across the wall space.
The solution:
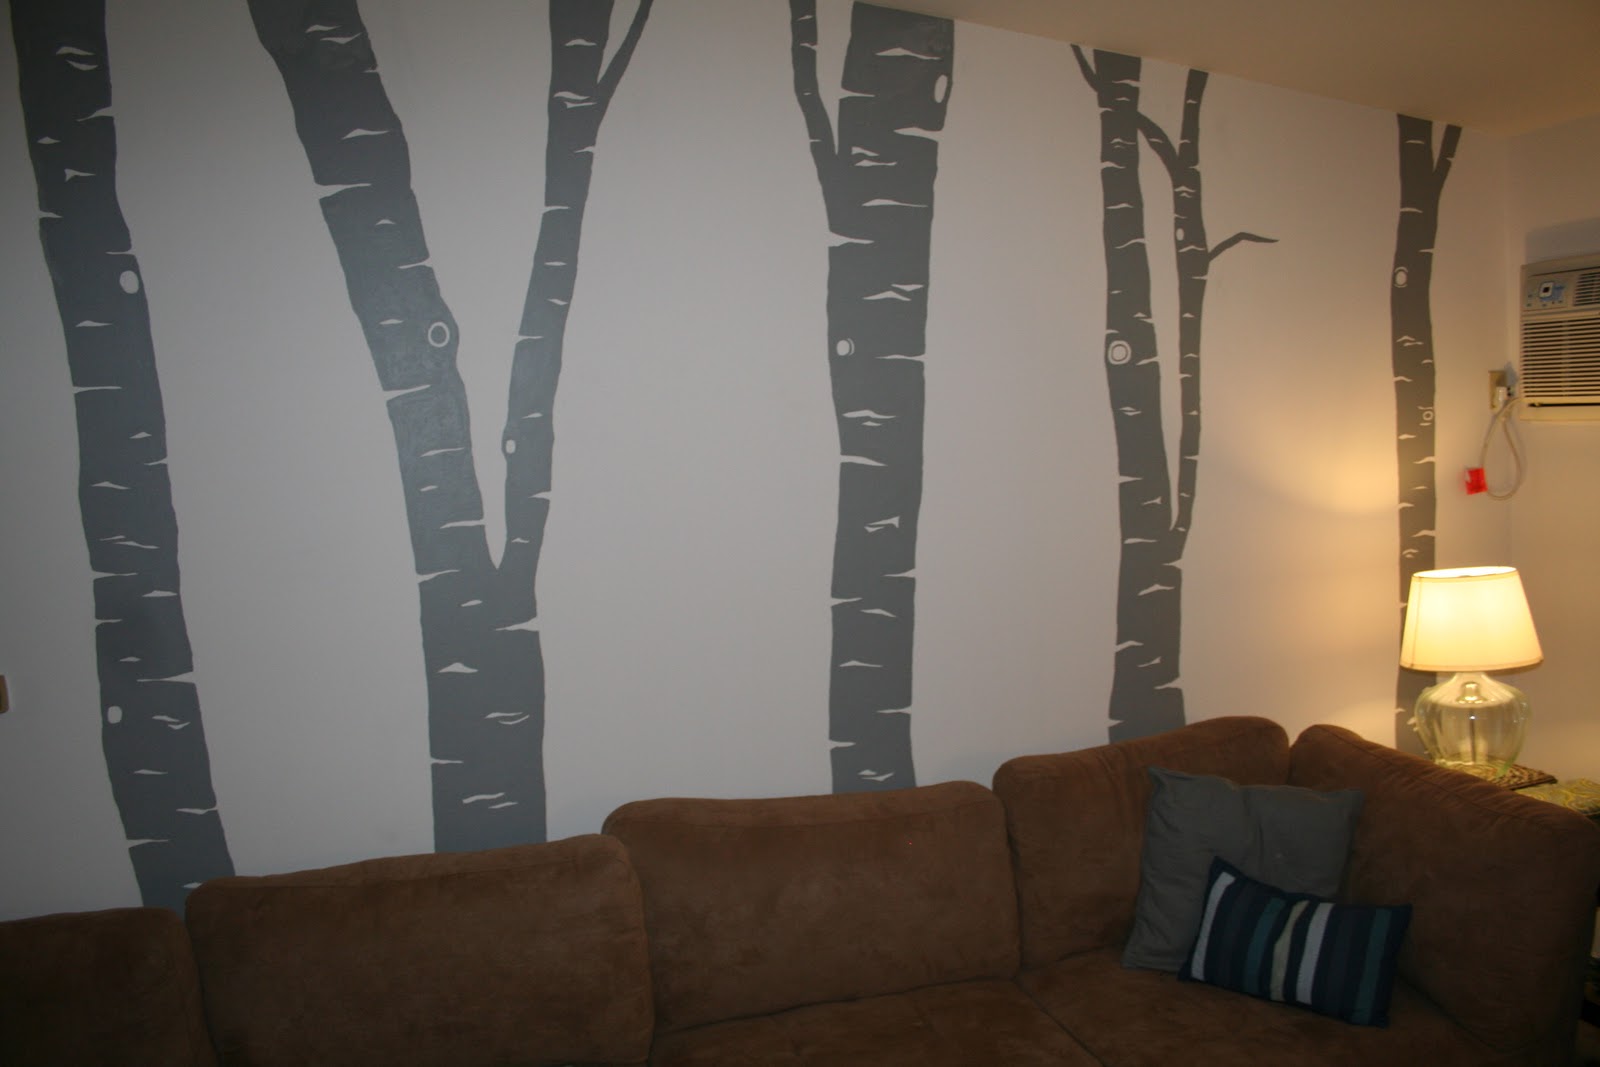
I am a pretty decent free-hander (as long as I have something to copy) and can color in the lines with a paintbrush, so I decided to paint the trees on the walls.


I found a picture of some wall decals on Ebay (Etsy is another good place to look!) and created my design based off of that. I liked the simplicity of birch trees, because they look really awesome and it made the project less overwhelming. If you're going to try this at home, pick a more simple motif if you're not an ultra-skilled artist.

I traced the outlines of the trees in pencil (always pencil so you can erase!) and then headed out to Lowes. It ended up taking 2 sample size containers of paint to fill in all of my trees. $4 and 6 hours later, I ended up with these!


If you want to make this at home, you'll need:
an idea! use a wall decal or something from your head
a pencil with a good, non-smudging eraser
paint in the color of your choice (I recommend buying a matte finish wall paint sample because the color selection is unlimited! match it to a favorite toss pillow or lamp shade- anything!)

Good luck and happy crafting!