Pages

Showing posts with label home decor. Show all posts

May 9, 2011

a bit obsessed with bunting...

I'm not sure what it is about bunting these days... but I just can't get enough of those darling little flags!

 Since Kev and I aren't exactly in the market for high-end art at this point in our lives, (let's be real... even the sale section of HomeGoods can be a bit over-priced) I decided that it was going to be my undertaking to create/find fabulous decor for our little home.

My sister-in-law Emily gifted me this fabulous little book for Christmas this year. Her taste in decorating is amazing and she has created quite a few splendid things herself (guest blogging potential? I hope!). This is my first project from the book, but I'm sure I'll be attempting others in the future.

Step one is finding some fabulous patterned papers from your local craft store, scrapbook store or specialty paper store. You'll notice that I did not end up using all of these, but I'm sure they'll find a crafty home somewhere.

Step two is collecting some thin card board; cereal boxes are a good source. Using a straight edge and ruler, cut a triangle out of the cardboard. Mine is as wide as it is tall, but yours doesn't have to be as long as the angles are the same and the edges are straight! Using your pattern, create as many cardboard flags and you'll want to use. I did eight flags, which made a decent-sized strand. When you have the cardboard ready, trace the shapes on to your paper, cut it out and paste it to the cardboard using modpodge. Use a hole punch to create holes about a half-inch in from the side in the top corners. This is the point at which I strayed from the book a little. Instead of using individual 5" pieces of ribbon to connect the flags, I decided to string them on some jute so the flags would be spread out a little more.

I used leftover 3M hooks to put them up (I used the super cheap kind that come in a large pack for hanging Christmas lights). I put three on an angle to give the look a little dimension and break up the cornery-ness of that area of the room. You could easily just tack loops at the end of the string with nails if you wanted to hang them straight!
If you want to try this at home, you'll need:
Thin cardboard
Ruler/straight edge
Patterned/colored paper
Hole punch
ModPodge
Ribbon/twine/jute
3M mini hooks/nails

First of all, yes, that is obviously Nick Stokes from CSI and I obviously did not want to turn it off to improve the picture because this part was clearly riveting. :)
Second of all, I was happy the result of the flags. I noticed a few flags that were on a sharper angle slid a little, but that is an easy fix with a little glue on the back of the flags.

I am using this a more of a permanent decorative item, but you could easily make these for a party because they are pretty quick and easy to make. They are also inexpensive because most crafters probably have most/all of the supplies at home anyway. Try making them for a party! You could also use contrasting patterned paper/solid paper to make letters and spell something out on your flags.

Let me know how your version turns out!

February 17, 2011

sprucing up the walls!

The problem:
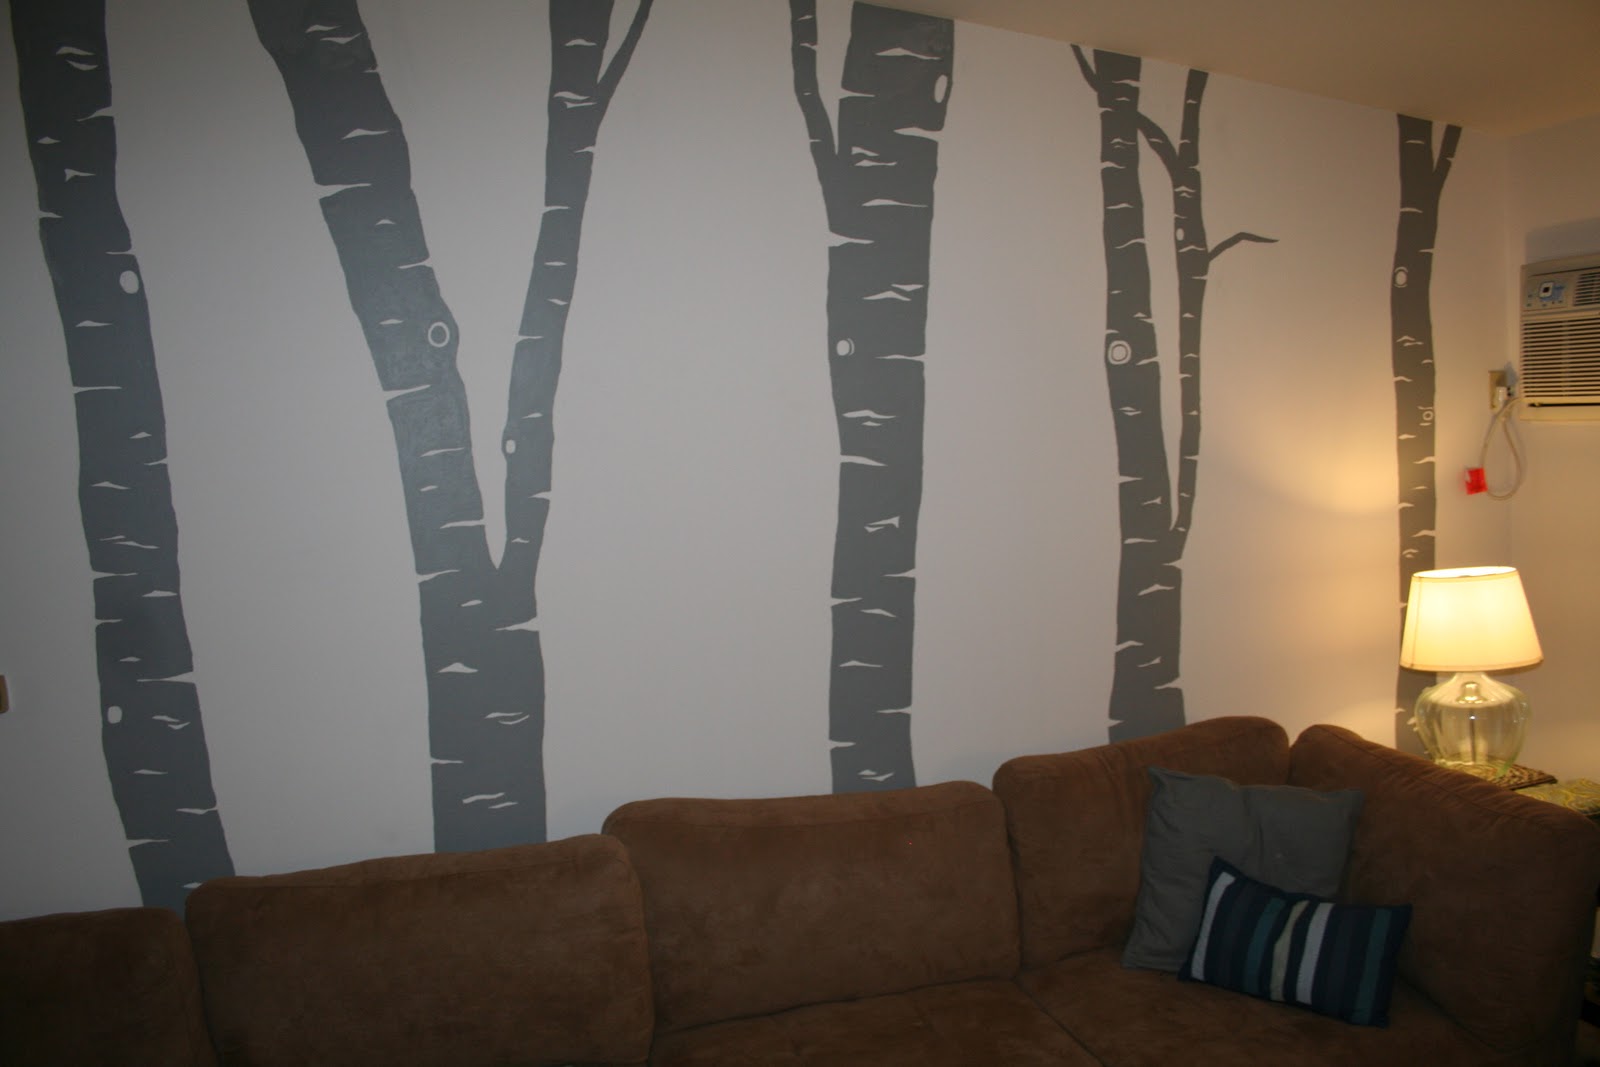
My apartment walls were plain and boring and they needed a little excitement! I thought about a photo collage but was having difficulty figuring out how to make it happen. Then my thought process moved on towards wall decals. There are so many cute options out there for wall decals, but finding them on a large scale can be quite pricey. The ones I was interested in, mostly floor to ceiling trees, were running about $90 for a set, and none of the sets had the height of my peaked ceilings for enough trees to stretch across the wall space.
The solution:
I am a pretty decent free-hander (as long as I have something to copy) and can color in the lines with a paintbrush, so I decided to paint the trees on the walls.


I found a picture of some wall decals on Ebay (Etsy is another good place to look!) and created my design based off of that. I liked the simplicity of birch trees, because they look really awesome and it made the project less overwhelming. If you're going to try this at home, pick a more simple motif if you're not an ultra-skilled artist.

I traced the outlines of the trees in pencil (always pencil so you can erase!) and then headed out to Lowes. It ended up taking 2 sample size containers of paint to fill in all of my trees. $4 and 6 hours later, I ended up with these!


If you want to make this at home, you'll need:
an idea! use a wall decal or something from your head
a pencil with a good, non-smudging eraser
paint in the color of your choice (I recommend buying a matte finish wall paint sample because the color selection is unlimited! match it to a favorite toss pillow or lamp shade- anything!)

Good luck and happy crafting!

February 7, 2011

monograms and buttons, oh my!

Our couch is massive. It sleeps 4... comfortably. So naturally, we have a serious need for throw pillows. I saw a cute idea I liked for a monogrammed pillow and thought, why not do it with buttons? I have a pretty substantial button collection that was passed down to me, so I already had most of the supplies at home.

I bought a pillow from Meijer. I totes dig the Katie Brown collection so I often check out the home goods section. I found a pillow I liked and traced a lower case g on it with a sharpie. If you are not a good free-hander, perhaps you should try chalk. I laid the buttons out and pinned a few down. A little rearranging was necessary to get a good shape.

Note: it will save time if you do not hot-glue the buttons to the pillow. It will be quick, but the buttons will fall off and you'll just have to sew them on anyway... fail.

At this point, I just sewed the buttons on, one at a time. I did need to rip a hole in the seam to fit my hand inside the pillow, which I stitched back up when I was done. It might be easier to start with a pillow that zips.

It might be cute to try this idea with something other than a letter... geometric shapes? an animal? Or maybe it would be cute to try multi-colored buttons as well?


I think the end result is sort of cottage-y chic.

If you want to make this at home, you'll need:
1 pillow, either one you've sewn or store bought
Buttons
Thread
Needle
Sharpie or chalk

I hope you learn from my mistake on this one and don't waste time gluing, because you'll also waste time peeling all of the glue off of the buttons before you can sew them back on. If your pillows are as well-used as ours, you'll need them to be sturdy!

Happy sewing!

February 3, 2011

a place to hang your pretty things

Hello! 
This is my first blog post of my first blog. My basic plan is to post creative projects as they come to me, so that everyone can see what I've been up to. I'll try to offer helpful hints as well, so you all can try the projects at home! Some ideas I find on other blogs (which I'll include links to, naturally) and some ideas sort of just come to me. So, without further ado and jibber jabber, here we go!

The problem: I needed a place to hang coats near the shoe basket and key rack. I wanted something that would match the adorable key rack my Grandma gifted me, without being overly matchy. I found an unfinished coat rack at Joann's and bought it (with my 40% off coupon, of course). I covered it in strips of newspaper mixed with a water/mod podge paste. In the end, I didn't exactly like the way it looked. I took a very pale gray/blue paint, mixed it with water and white-washed the whole piece. Once it was dry, I pained leaves on it with a subtle gold paint. 

I loved the idea of the shelf on top, since it meant I could decorate the rack however I liked. I found directions for the paper mache birds in a magazine, which are made with cardboard and blown out eggs. I white washed those as well. The bottles were a thrift store find. The word home was unfinished wood that I painted blue, then gold, then sanded the edges so a little blue and natural wood would come through.

I really like the way it turned out, and once we stuck it on the wall, it was as utilitarian as it was welcoming!

If you want to make this at home, you'll need:
unfinished coat rack (local craft store)
newspaper
paint (white-wash color and accent color)
paintbrushes (one for mod podge, one for paint)
mod-podge (I used matte finish instead of glossy)

Good luck crafters!